
Add your first product
A clear, well-photographed product is what turns a browser into an order. Here's exactly how to add one, step by step.
5 min readUpdated August 2026Everything customers can buy lives under Products. From here you build your menu, sort it into categories and add the offers that bring people back. Let's add a product.
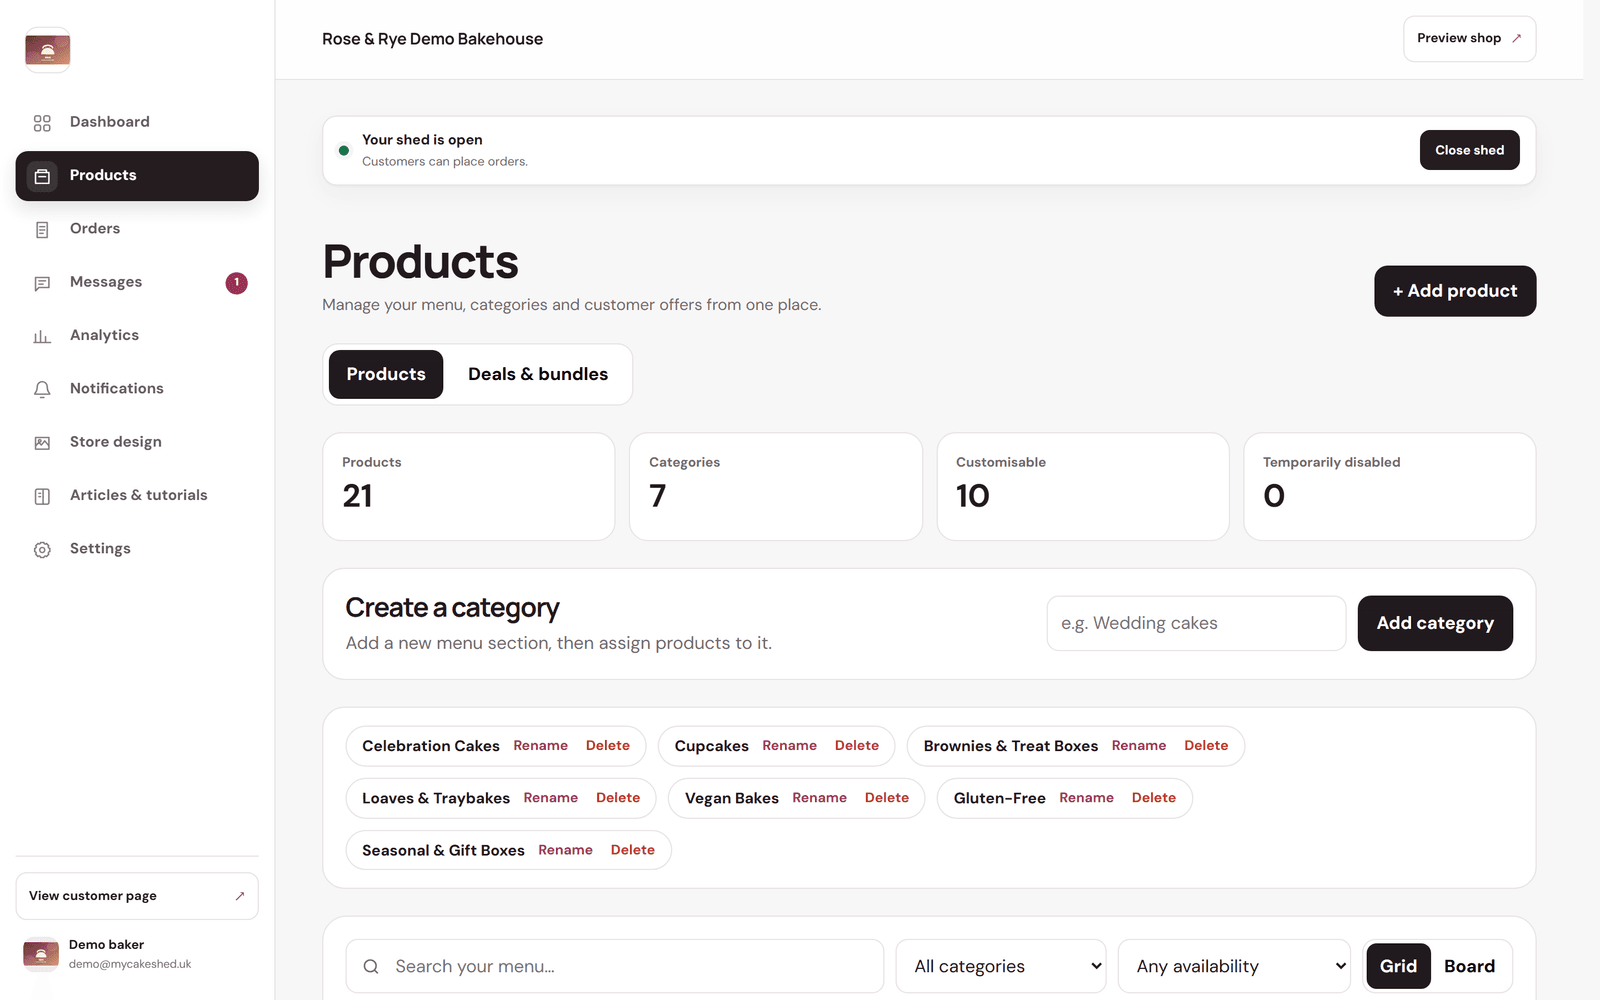
Open the product form
- From the left-hand menu, choose Products.
- Click "+ Add product" in the top-right corner. A form opens over the page.
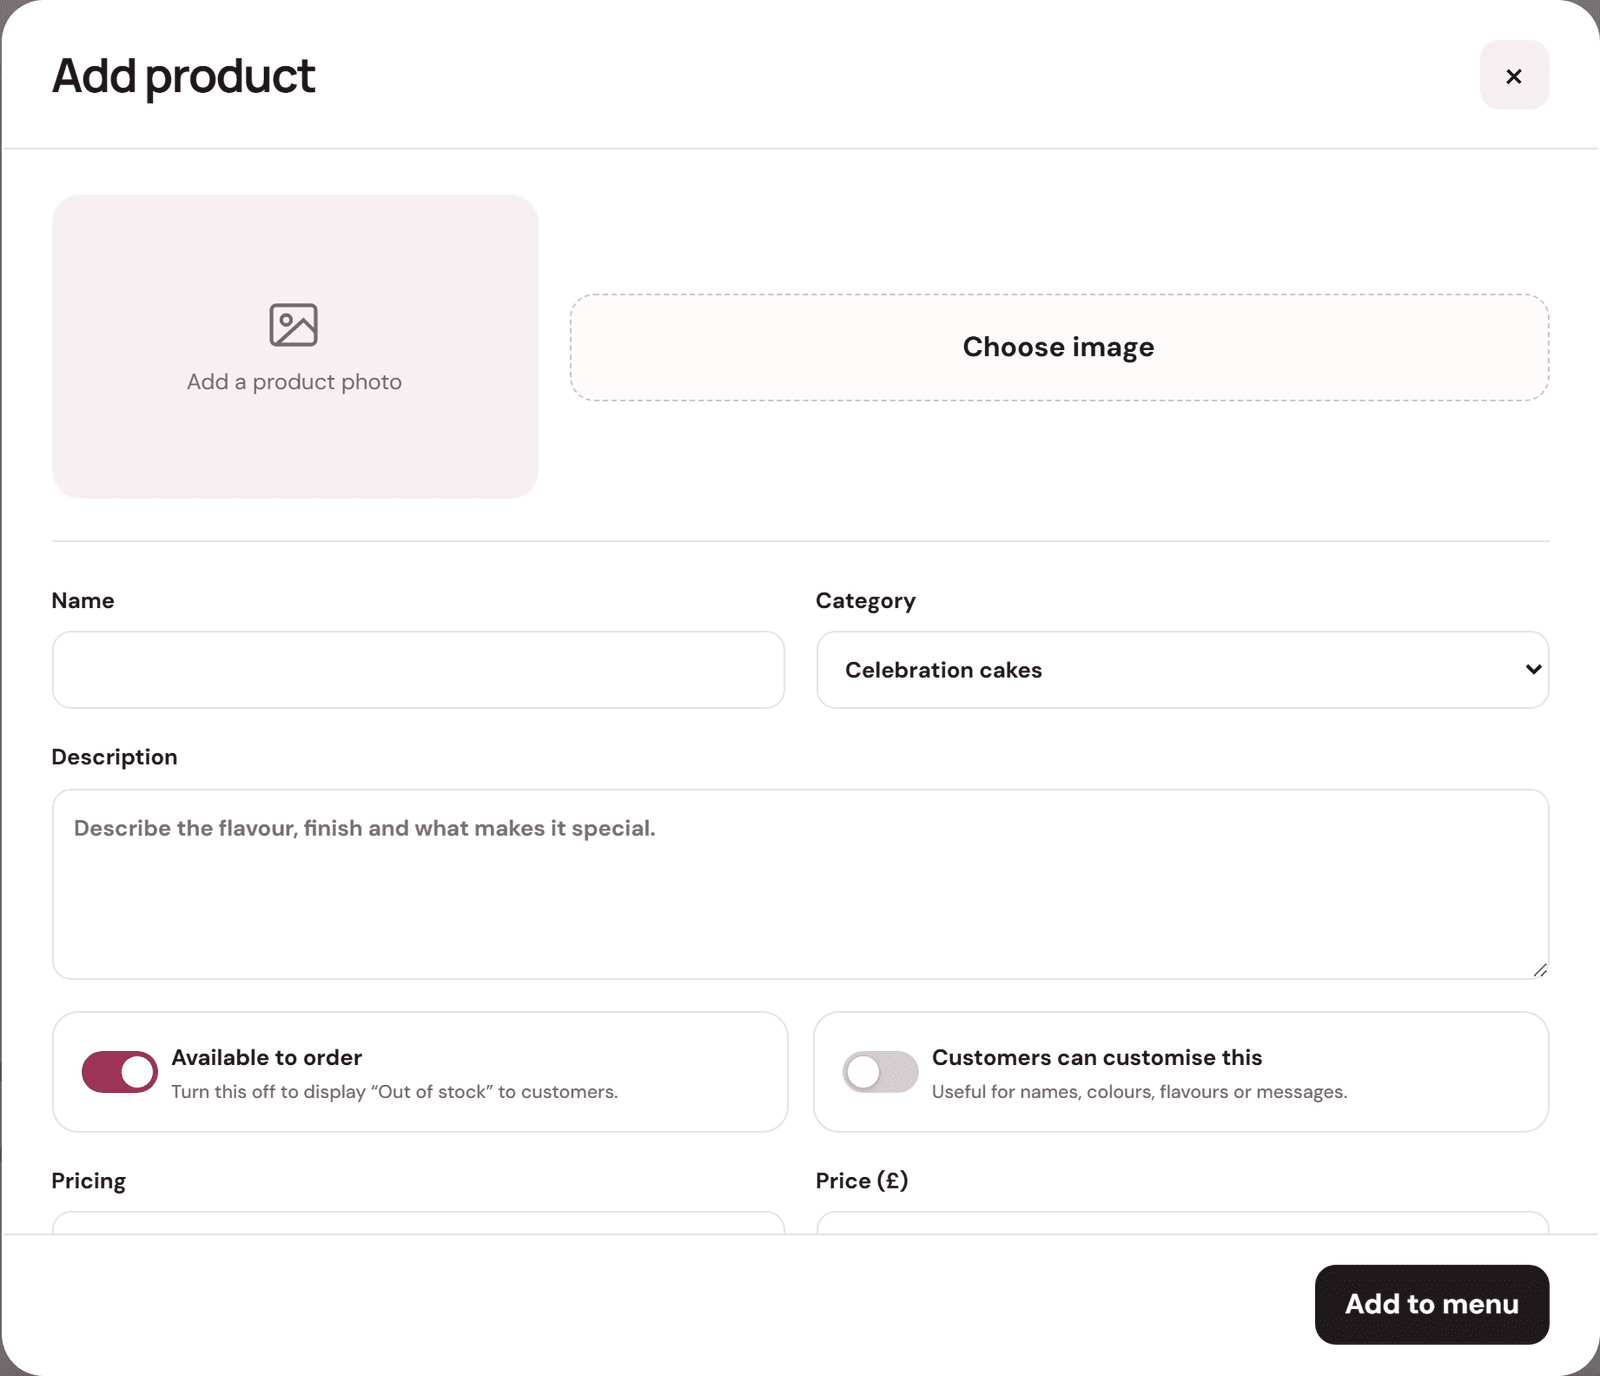
Fill in the essentials
- Photo — click "Choose image" and upload a bright, clear picture. Products with photos are ordered far more often (see "Photograph your bakes so they sell").
- Name — what customers will see, e.g. “Sea-salted caramel brownie box”.
- Category — group the item so your menu stays tidy (Celebration cakes, Cupcakes, and so on).
- Description — a short, appetising line about the flavour, finish and what makes it special.
- Price — the amount the customer pays. For a made-to-measure item, switch pricing to bespoke so customers request a quote instead.
Set availability and options
- "Available to order" — leave this on to sell it. Turn it off to show "Out of stock" without deleting the product.
- "Customers can customise this" — turn on to let buyers add a short note (a name, colour or message) at checkout.
- Serving size and lead time — scroll down to tell customers how many it serves and how much notice you need.
- Allergens and ingredients — add these so customers can order with confidence. It's good practice and it cuts down on questions (see the food-safety guide).
When everything looks right, click "Add to menu". Your product goes live on your storefront immediately — no waiting and no separate publish step.
Create your categories first (there's a "Create a category" box on the Products screen). A shop grouped into clear sections is much easier to browse than one long list.